builders merchants surrey, building supplies leatherhead, Building Supplies London, building supplies surrey, landscaping supplies leatherhead, landscaping supplies surrey
Paving Perfection – Four Tips For Success
Mar
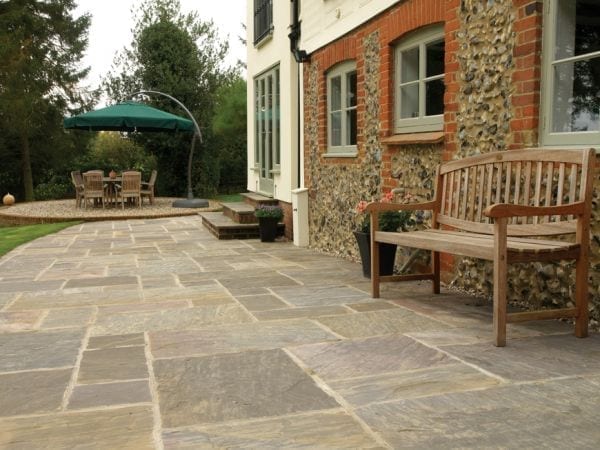
How to lay paving slabs for a patio
This is a general how to on laying paving slabs. The technique explained is for paths and patios that do not take any weight i.e. cars. If you do anticipate the slabs will be under any weight stress you may need to lay a deeper foundation and the slabs or block paving should be thicker than standard decorative slabs.
Planning the Paving Area
Before you start…
Draw a simple plan of your home and garden, sketching where you would like areas to be paved.Try to design you patio incorporate sizes of paving that will eliminate the need for cutting. Once your plan has been finalised, lay out lengths of string to mark out the dimensions of your purposed patio in position. When you are happy with this, let the digging commence.
When deciding which paving slab you prefer bear in mind that the catalogue picture may not be exactly the same as the real thing. Therefore if you are uncertain on the shade or texture of the slab please ask us for a sample. If they are for a patio, try to see it laid somewhere in a real life situation. Don’t buy on the basis of catalogue pictures.
There is no need to use one type of paving or surface. Bricks, tiles, pebbles, granite setts and gravel and tiles can all be incorporated in the design. A contrasting brick or granite sett edge can also be very effective.
If the patio is being laid close to the house it is advisable to choose a colour that contrasts or compliments the colour of the bricks. Do not try to match the colour of the brickwork, use lighter paving for dark brickwork and darker paving for light coloured brickwork.
There are many manufacturers of concrete paving slabs to choose from which include Pavestone, Marshalls Paving, Stonemarket, Brett Paving and Bradstone.In addition there are natural stone paving slabs such as Indian sandstone, limestone, yorkstone, granite, portland stone, slate and travertine.
Preparation
If the patio is going next to the house, then the fall must be away from the house. To ensure that water does not collect on the paving, the foundation needs to have a fall of 1 in 60, which means 10mm of fall for every 600mm of width. So a 3 metre wide patio will need 50mm of fall.If it is absolutely impossible to fall away from the house, the surface water must be intercepted by a suitable drainage channel with adequate collection pit/soak-away. This is best incorporated when you lay your patio. The finished level of the patio should be at least 150mm below the house damp proof course and do not forget the thickness of the slab in your measurement.
If the area to be paved has hard well-compacted soil base, then it will not be necessary to lay large quantities of sub base material (MOT Type1 or Hardcore).Basically if you can dig your heel into the surface, then it will need firming up with a layer of MOT type 1 sub-base, compacted into the surface with a hired plate compactor or roller.
If the area was previously turfed or a flower bed you will most certainly need a compacted base of sub base material to a depth of between 75mm and 100mm followed by a around 35mm bed of coarse sharp sand.
STEP 1: Preparing foundation base
Firstly the ground needs marking out to scale with pegs and line so it is clear what area needs to be dug out. This area needs to be clear of all vegetation.
Mark out the site with pegs and string. The pegs should be driven into the ground so that their tops are at the height of the proposed finished level. By setting a peg in each corner, you can then build up a grid of pegs according to how large the patio is.
By measuring down from the top of the pegs, you can establish how much soil to dig away – enough for slab thickness plus the various layers of the base. String lines connecting the pegs will assist with this.
The level of the patio at the house wall must be at least 150mm below the damp proof course. This is usually visible as an extra wide line of mortar in the brickwork.
The patio will need to gently slope away from the house (1:60 for most circumstances) so that rainwater does not pool on it. For large patios, you should also have a cross fall of 1:80 to improve water run-off. Use a straight timber batten and sprit level resting on the pegs to get the level.
If the ground is solid then dig out enough soil to accommodate the thickness of the slab itself and a bed of around 35mm mix of coarse sharp sand/cement. Bearing in mind the top of the paving slab will need to be 150mm below damp course level. If the ground is solid, you can go ahead and lay onto this since the layer of sand/cement mix will provide a good base. However, if the ground is still soft, you will need to dig out another a minimum 75mm and lay a MOT type 1 sub base to prevent the patio from sinking in the future.
If you need to use a layer of MOT type 1 on the excavated area spread a minimum layer 75mm.Remember to leave room for the thickness of the flags and 35mm of mortar mix. Compact the layer of MOT type 1 thoroughly, ideally using a plate compactor.
STEP 2: Mortar Preparation
Lay the paving slabs on a full mortar bed which should support the whole slab, not just the corners.
Use a mortar mix of 4 parts sharp sand to 1 part cement.
Mix together with just enough water to make it damp and workable, but not overly wet and runny.
STEP 3: Laying the paving
First set up 2 taut string lines to guide both the line and the level of the paving. 1 line should run down the length of the patio and the second line side to side, with one including the fall for drainage.
Start from the corner and work your way out from there.
Spread out mortar to cover an area slightly larger than the paving slab you want to lay and high enough to allow you to tap down the flag to the correct level.
Lift and lower the slab into place careful not to catch the corners.
Using the rubber mallet start to tap it down, hit the paver, firmly but not too hard, at a point that is roughly midway between the centre of the paving slab and each corner along imaginary diagonals. Move around the paving, tapping in succession until the flag settles down to the correct level.
Check the paving is level with a spirit level and that you have included a fall and then start to lay the rest of the paving,
Once laid, the patio should be left for around 24 hours to allow the bedding mortar to harden and should not walked on.
STEP 4: Jointing the paving
Use a mortar mix of 3 parts soft building sand to 1 part cement and mix it slowly adding a little water at a time to get a smooth, damp consistency not wet or sloppy. A plasticiser can be added to make the mortar easier to work. When laying the slabs, make sure you leave a gap of about 1 inch for the pointing. Make sure the slabs are level to the pegs you hammered in earlier.
Trowel the mortar into the joints, pressing it down and smoothing over using the pointing iron if necessary.
Take care to avoid any mortar going onto the surface of the paving slab. Surplus mortar can be scraped off, but it is often best to leave these bits for a few hours until the mortar has started to harden.
Once the mortar has hardened, all you need to do is give the patio a good sweep and then that’s job done.
As a reminder follow these four tips for success:
- Always dry lay the patio first to ensure you have checked the measurements
- Create a good solid foundation and check the depths
- Start laying the patio from the corner and work outwards
- Check the levels and fall frequently to make sure you stay on track
Here is a video which will also help you create your patio.